Wednesday, July 13, 2011
10 Excellent Online To-Do List Managers
People who work on computer often like to keep a track of things they have to do in future. This is where To-Do-List managers come in action. If you are willing to have your record online and keep a schedule of things you need to do then I have gathered 10 most interesting web applications that can help you have your own TO-Do-List manager.
Before we continue with the list, you may want to read the following:
- 10 Excellent Websites to Download Subtitles for Movies/Tv Shows
- Top 10 Websites to Create Funny Photo Effects
- 10 Best Websites to Download Free Blackberry Themes
- 10 Best Websites to Download Freewares
- 8 Free Websites to Create Twitter Backgrounds
Below is the list of 10 excellent online tools to manage your task online:
1. Remember The Milk
Remember the Milk is one of the best online to-do list managers. With Remember the Milk, you can easily manage all your tasks, set dates, time, categories and even geolocation. You can even integrate your Gmail, mobile number and get email, SMS, IM alerts about the tasks. You can even use Remember the Milk desktop application and updates task from your desktop or use your iPhone or iPod to manage the lists. You can sign up.

2. Google Tasks
Google Tasks is an excellent online tool which integrate with other Google services (Gmail, iGoogle, Google Calender etc.) and helps you schedule tasks, set due dates, add notes and much more.

3. HipCal
HipCal is an excellent online calendar, to-list, and address book which can help you manage and schedule your tasks. With HipCal, you can add new tasks, specify due dates, prioritize tasks and get alerts via email or SMS.

4. Ta-Da Lists
Ta-Da List is one of the simplest online to-do list managers. With Ta-Da List, you can create lists for yourself and share them with your friends.

5. Nutshell
Nutshell helps you search the web, take notes, and manage your to-do list quick and easy. With Nutshell, you can schedule tasks, get alerts, set due dates and much more.

6. Hi-Task
Hi-Task is an excellent online task management tools which helps you schedule and manage personal/group tasks easily. You can create a task, share it with your friends or team and assign different people tasks they are supposed to do.

7. Checkvist
Checkvist is an excellent online collaborative outliner and task list manager which enable users create different tasks, share them with their friends and colleagues, copy and move tasks between checklists and much more.

8. Todoist
Todoist is a task manager that’s useful, fast and easy to use. With Todoist, you can set due dates and get overview over what needs to get done, create sub-tasks, Gmail integration, email reminders and much more.

9. Task.fm
With Task.fm, you can create reminders, set due dates, create reminders in email or twitter, send reminders to your friends and other contacts, message alerts and much more.

10. Toodled
Toodled is an easy to use, online to-do list manager which helps users create tasks, sub tasks, set due dates, tags, goals, contexts, time estimates and much more. You can even share the tasks with your contacts and access the created lists from anywhere in the world.

If you know about any other to-do list manager please share with us.
Labels: To-Do List
Saturday, April 30, 2011
7 Free CSS Editors, Which Is the Best? You Choose.
I have always used Dreamweaver, and love it. But, I have been thinking, what are the FREE CSS editors like? So I went looking , first one I found was TopStyle Lite, it was OK, nothing special, and then tried some others.
It did get me thinking, Which is the best FREE CSS Editor available? So, over to you, what do you think?
I have listed 7 Free CSS Editors to help with your choice. If I have missed any, write a comment and I’ll add it to the list.
Vote at the bottom of the Article.
Simple CSS
 Features :Simple CSS allows you to easily create Cascading Style Sheets from scratch, and/or modify existing ones, using a familiar point-and-click interface. Compatabile with Mac, Windows and Linux.
Download: Simple CSS Download Page.
TS Webeditor (tswebeditor)
 Features :tsWebEditor is an editor for HTML, PHP, Perl, JavaScript, CSS and many other languages. It displays the source code colored (syntax highlight), code hint for functions, code completion (PHP, JavaScript, ASP, HTML), code browser, PHP debugger and syntax validation, help, CSS wizard, HTML tag editor, HTML syntax validation, and an easy to use SQL Designer. To view all features click here.
Download: TS Webeditor Download Page.
A Style CSS Editor
 Features :Visual easy-to-use interface ; Graphic tree-type view of attachment files and the CSS structure ; Grouped view of properties and selectors ; Automatic selection and grouping of CSS selectors from a markup language document ; Source CSS, HTML, XML highlight code editor ; Active preview current selectors and documents with IE and Mozilla support ; Clean up HTML document via CSS ; Icon associate dictionary ; Copy, Paste and Cut operations ; Drag and Drop operations…
Download: A Style CSS Editor Download Page.
CSSED – “A GTK-2 CSS Editor”
 Features :It features syntax highlighting, syntax validation, MDI notebook based interface, quick CSS properties and values insertion, auto-completion and dialog-based insertion of CSS complex values.
Being a CSS editor, its not limited to this language. CSSED haved some support for HTML (with embbeded Javascript), XML, Javascript, Java, PHP, JSP, C, C++, Apache configuration files, .htaccess, Python, Perl, SQL, SH and other languages so it can serve quite well as multi-purpose editor.
Download: CSSED Download Page.
ELEDO – Eledicss
 Features :Eledicss is a CSS2 editor (GPL licensed) implemented as a server-side PHP script. It allows editing CSS files using a web browser.
It can be installed both on UNIX and Windows webservers. It was tested on PHP 4.1.2 on server side, and Mozilla 1.0 on client side. Eledicss should safetly work on all PHP 4.X versions.
Download: ELEDO Download Page.
JustStyle CSS Editor
 Features :JustStyle CSS Editor is full-featured, yet easy-to-use, software for webmasters. It is a specialized style sheets development environment, featuring everything needed to develop and deploy cascade style sheets. JustStyle CSS Editor provides an interactive user interface and presents CSS properties in special wizards and generic value lists.
Written entirely in Java, it works on different platforms, such as Microsoft Windows, IBM OS/2, Linux, Apple Mac OS, Mac OS X and others.
Download: JustStyle CSS Editor Download Page.
TopStyle Lite
 Features :Click here to read the differences between TopStyle Pro and TopStyle Lite. This small freeware version still has plenty of power for most CSS editing.
Download: TopStyle Lite Download Page.
Labels: CSS
Wednesday, June 02, 2010
KDE vs. GNOME: Is One Better?
April 16, 2007
By Bruce Byfield
One of the hardest things for users of other platform to understand is that GNU/Linux does not have a single graphical display. Instead, there are dozens, ranging from basic window managers that control the look and positioning of windows in the X Window system, to complete desktop environments with a wide variety of utilities and specially designed applications.
However, for most users, the choice comes down to either GNOME or KDE, the two most polished and popular choices.
Which is right for you? In this two-part article, we'll make a close comparison of the two desktops, trying to get away from the holy wars that often obscured this topic. The goal is to discuss the differences as dispassionately as possible.
Here in Part 1, we'll discuss where the KDE and GNOME desktops come from. We'll also discuss the basic features that distinguish them from desktops on other platforms and their customization options.
In Part 2, we'll discuss the utilities, administration tools and desktop-specific applications of each.
History
In the mid-1990s, desktop options for GNUI/Linux and other UNIX-like systems were limited by lack of functionality, or by philosophical freedom – or both.
On the one hand, users could choose window managers like FVWM that had relatively little functionality compared to the Windows or MacOS desktops of the time. On the other hand, they could choose the proprietary CDE, a desktop built using the Motif toolkit, and developed by The Open Group, a joint effort of Hewlett-Packard, Sun Microsystems, IBM and Novell.
In response to this situation, Mattias Ettrich, then a student at the Eberhard Karls University in Germany, began work on the K Desktop Environment (KDE) in 1996. The project had two goals: a unified look to applications, and ease of use.
KDE quickly attracted developers, but immediately ran into controversy because of its decision to use Trolltech's proprietary Qt toolkit. In response, in 1997, the GNU Project began two subprojects to develop a free software desktop.
The Harmony project, intended to provide a free version of Qt, never did very much, but the GNU Network Object Model Environment (GNOME) became the major rival to KDE, with its applications licensed under the GNU General Public License (GPL) and its libraries under the Lesser GPL, so that they could be linked to proprietary applications.
The difference in licenses between the two desktops soon ignited a fierce rivalry between their supporters, complicated by the fact that in the early years KDE was easier to use and included more utilities, making it more popular than GNOME. Trolltech responded to criticisms by releasing Qt under the Q Public License (QPL) in 1998, but this license was not accepted by the Free Software Foundation as a free license, and the controversy continued until 2000, when Qt was released under a dual QPL/GPL license.
Since then, the rivalry between KDE and GNOME has lost much of passion. However, you can still sometimes hear developers argue over which has the superior object model or some other technical aspect that is mostly invisible to the average user.
Occasionally, too, the rivalry flares up for other reasons, as when Linus Torvalds recently criticized GNOME's development policies in public. However, those most involved with the two desktops have generally learned to co-exist, working to assure interoperability through cooperation and the development of common standards via freedesktop.org.
Probably the one thing that distinguishes GNOME today at version 2.18 is its attention to usability, which is continually resulting in a refinement of its desktop – to the extent that some, like Torvalds, have become frustrated by the increasing difficulty of using it for advanced purposes. Another trend is a growing tendency to make its utilities – specifically its panel applets – dependent on Mono, the C# clone that is another project championed by Miguel de Icaza, one of GNOME's founders.
Just now, KDE is at version 3.5.6, but is becoming increasingly focused on its 4.0 release, scheduled for release by the end of 2007. This release promises to be a major revision of the desktop, with a default scalable vector graphics theme, a new file manager, a rewriting of the API for its core libraries, and new interface guidelines.
Figures vary with different studies, but today, KDE is probably used by about 65% of GNU/Linux desktop users, GNOME by roughly 26% (the rest of the market is represented by alternatives like Xfce and several advanced window managers).
However, GNOME has a larger presence than its popularity suggests because it is the default of several major distributions, including Fedora and Ubuntu, and because of the GNOME Foundation, which includes strong corporate representation, tending to make it more acceptable in business.
By contrast, the corresponding KDE League never developed the same influence or penetration into business, and is now defunct. Instead, KDE appears to maintain its importance through popularity alone.
Basic Desktop Features
With common roots in UNIX as well as imitations of Windows, OS X and each other, the modern GNOME and KDE have more similarities than differences.
Despite their different toolkits, it is not difficult to mockup either to look like Windows – or like each other, as Red Hat did a couple of years ago. In fact, what would probably strike most Windows users are a number of shared features with which they are unfamiliar. While new users of GNOME and KDE can quickly acclimatize to the desktop of icons, as well as the panel for notifications and docking minimized windows and the main menu, some of the details may take longer to become familiar with.
One of the most obvious features of KDE and GNOME are the virtual desktops – or workspaces, as GNOME call them. Under any name, these desktops are a way of increasing the area in which you can organize the programs you’re working with. You could, for instance, keep a web browser open in one desktop, a command shell in another, and a word processor in a third. To move between them, you can click on a thumbnail on the panel, or configure them so that sliding the mouse to the edge of one seamlessly moves you into another. The only limit is that each virtual desktop adds to the memory overhead.
Another major difference from other desktops is that both KDE and GNOME make extensive use of panels. In addition to basic features such as the main menu, a clock, a windows list, and system notification area, both desktops include dozens of applets for system and hardware monitoring, as well as easy access to basic utilities such as search tools.
Recently, GNOME developers seem to have been especially active in developing panel apps, some of which, like Tomboy, are showing such an increase in complexity that they deserve to be considered full-fledged programs rather than utilities. Both desktops allow multiple panels and their positioning on any side of the desktop, and customized menus, either in the form of GNOME's drawers or KDE's Non-KDE Application Launchers or Quick Launchers.
Other features shared by both: the ability to rollup windows so that only the title bars are visible; a broad choice of keyboard shortcuts; and a traditional if technically unnecessary selection of screen savers.
A lesser known shared feature – and one that both KDE and GNOME developers seem to prefer to hide – is that, users can replace the default window managers, Kwin and Metacity. From both desktops, you can change the window manager temporarily by typing new windowmanager --replace from the command line. In KDE, you can permanently change the window manager by changing the environment with export KDEWM=windowmanager, while in GNOME you can do so by editing .gconf/desktop/ghome/applications/window-manager/%gconf.xml in the current user account's home directory. However, before doing so, you should check that the new window manager is compatible with the desktop.
At this point in their development, the differences in basic desktop features are mostly minor. However, if I had to choose, then KDE has the edge.
It begins with a wizard that helps users customize their desktops and, even more importantly, choose the amount of eye candy they use; many, I suspect, automatically turn off the bouncing icons that appear while a program is loading.
Startup tips are also available, which are useful way for new users to learn the desktop in painlessly small increments. In addition, KDE includes menu items for organizing open windows, several different types of panels, and a multiple clipboard that is so convenient that I use it in GNOME as well.
Historically, too, KDE tends to have more complete help files, although the last few releases of GNOME are rapidly closing that gap. The one annoying feature in KDE is the truncating of long file names below icons.
Customization
From their earliest days, the do-it-yourself tradition found among users of UNIX-like systems has ensured that both KDE and GNOME are so highly configurable that new users are likely to develop option-anxiety if they try to deal with them all at once.
A surprising exception is the main menu, which, in GNOME, only recently became editable again thanks to the addition of the Alacarte Menu Editor after several years in which no menu editor was available.
Otherwise, looks and behaviors are highly customizable in both GNOME and KDE. Both allow a customized screen resolution and mouse behaviors, a selection of sounds and fonts, and the setting of preferred applications, such as web browsers, terminal emulators, and file manager.
Both, too, give an exhaustive set of options for how windows are placed, moved, minimized and maximized, stacked, and selected as active. The main difference between the two desktops is that GNOME tends to handle windows in relation to their parents or to a specific location on the desktop, while KDE is stronger in dealing with them as a group and keeping users from getting lost in them.
However, which of these methods is preferable seems largely a personal choice. A more important difference is that, in KDE, the behavior of individual windows can be customized, while in GNOME, a similar degree of control is not possible with the default Metacity window manager, unless the Devil's Pie program is installed.
For both desktops, dozens of themes and styles are available to customize the desktop with pre-defined color schemes, icon sets, and window decorations such as title bars and buttons for minimizing, maximizing, or closing windows. Dozens more are available online, and all can be further customized by users willing to take the time.
With such a thorough selection of choices, either KDE or GNOME can be customized to produce a desktop that proves, once and for all, that GNU/Linux is ready for the average user.
Which you prefer depends on what is important to you. To many, GNOME's font anti-aliasing seems smoother than KDE's, while others might prefer GNOME for its encryption and accessibility options.
Alternatively, you might prefer KDE for the ability to set the desktop-wide spellchecker or for the easy alteration of the opening splash screen compared to GNOME. Increasingly, the differences are minor, and, in many cases, can be minimized by anyone with the patience to experiment with all the configuration options.
Conclusion
KDE and GNOME both inherited the extreme individualism and love of innovation common to users of UNIX-like systems.
For much of their existence, they also played catch-up with Windows and with each other – however much their advocates might be tempted to deny the fact. After over a decade, the result is that, despite different design philosophies, the two desktops have come to resemble each other more than any of their rivals.
In terms of basic desktop features and customization, the difference is likely to come down to a matter of work habits and inclination. Increasingly, your choice may be a matter of one or two features to which another user is completely indifferent.
And what about the programs designed for each desktop? We'll examine them in Part 2 of this article.
== Part 2 ==
In Part 1 of this article, we looked at the history of GNOME and KDE, their basic features, and their customization options. In part 2, we'll look at the programs designed to run with both desktops, from the administrative tools and utilities, to the office programs and other applications designed to work with them.
Both KDE and GNOME, you'll find, have specific naming conventions for any program associated with them. In KDE, the tradition arose early of choosing a name that starts with the letter K, such as Kontact, or contain the letter somewhere in the name, such as digiKam. This practice is not only too Kute for words, but often makes it hard to remember which program is which, since only a few of these names, such as KMail, have much relation to what the program actually does. GNOME programs sometimes follow a similar practice of starting with the letter "g" as in GParted, but this practice has never entirely caught on.
One more thing: if some of the programs mentioned in this article aren't installed on your system, don't be surprised. GNU/Linux distributions vary widely in what portions of GNOME and KDE they install. A default Debian installation, for example, includes minimalist versions of KDE and GNOME that omit most of the desktop-specific applications. Other distributions choose the applications to install, and a few install the entire range of programs associated with the desktop.
Administrative Tools
While KDE centralizes administrative tools into a single window called the KDE Control Center, GNOME disperses them into separate windows, although keeping them together in the Desktop -> Administration and Preferences menus.
Despite this difference in organization, the selection of administrative tools in GNOME and KDE is similar, and has grown over the last few years -- so much so that the cry for for a cross-desktop control center has become rarer in the last few years, although distributions such as Suse and Mandriva continue to offer them.
Both desktops cover peripherals and external storage devices comprehensively, except -- for some reason -- for sound card configuration. Users, date and time, and services also have their own tools on both desktops. GNOME distinguishes itself through its Power Management and Shared Folder tools, the KDE Control Center through a system summary that is a graphical combination of the uname -a and w commands, a tab for setting locales, and -- most importantly -- a tab for installing and removing system fonts.
In both desktops, the organization of administrative tools could be improved by clarifying which tools are for system wide settings and which are for the current user account. If you are an inexperienced user, it can be hard to remember until you click which tools require logging in as the root user. In much the same way, both mix customization and administrative tools too freely for easy navigation. These problems are slightly worse in KDE because its menu items are sometimes less carefully named; for example, KDE refers to "storage media" where GNOME mentions "Removable Drives and Media."
Otherwise, choosing which tool set to use for administration depends largely on what annoys you least. For some, scrolling through the KDE Control Center is nightmarish, while others dislike having to open each GNOME administrative tool separately from the menu.
Accessories and Utilities
Once you move away from the administrative tools, the desktop-specific software depends heavily on which distribution you install.
However, my impression is that GNOME tends to focus more on small utilities. Increasingly, these small utilities are presented as panel applets, but others such as the calculator, character map, and dictionary are included in the menu. GNOME also includes some tools whose usefulness seems questionable; I doubt, for instance, that anyone interested in viewing the system logs is going to use the GNOME System Log rather than a command line text editor.
In comparison, KDE's focus in accessory and utilities is in monitoring and information. Outstanding examples include the KInfoCenter, which summarizes hardware and system settings, and KDE System Guard, which monitors system performance. These tools are not by any means unique to KDE, but their organization of information makes them easy to scan.
Both KDE's Konsole and GNOME's GNOME Terminal are emulators that support multiple tabs and whose background and foreground colors and fonts can be heavily customized. Both, too, are convenient for copying and pasting from the command line to other programs on the desktop. However, Konsole offers more comprehensive menus, with items for printing the screen, opening Midnight Commander (a text-based file manager that resembles the old Norton Commander from DOS), moving back and forth in the command history, and for bookmarking directories.
A particularly useful feature of Konsole is the ability to monitor tabs for activity or silence, which can be useful when you are compiling or running lengthy commands such as a grep search on the entire system. Next to these conveniences, GNOME Terminal seems painfully basic -- or, to put a more positive spin on the difference, designed for users who are extremely comfortable with the command line.
The same is true for the default desktop text editors. Both Gedit and Kate can handle a variety of different types of text files, such as HTML, XML, or scripts in different standard programming languages, highlight syntax in different colors and check spelling. Yet, beyond the basics, KDE's Kate offers a wealth of extras.
They include export to a mail program and tools for changing the case or indentation of selected text. Moreover, at a button click, Kate opens a pane that can list open documents, present a tree of the filesystem, a find utility with a full range of regular expressions, or a terminal. Admittedly, some distributions install a stripped down version of Gedit that limits its functionality, but, even at its best, GNOME's text editor is limited compared to KDE's Kate.
In file managers, GNOME and KDE take different approaches. GNOME's Nautilus is so tightly integrated into the desktop that all desktop folders are potentially a file manager. Although this approach is often useful, it is seriously weakened by a default view that offers a tree view in a pull-down menu available from the bottom of the window that must be navigated one step at a time if you are using a mouse. Nautilus' File Browser tool, available from the main menu as a system tool, is a traditional two-pane file manager, one of which can be configured to display the directory tree, and is consequently far more powerful.
By contrast, KDE's Konqueror also doubles as a web browser. It is also tied to the desktop folders, but its default two pane structure is more useful than Nautilus' single pane one. In addition, it includes links to a mail program, termina, and the main menu. Neither shows hidden files by default, and both support bookmarks, file sorting, and a variety of views. Nautilus also includes the ability to categorize files with emblems, although I have never known anyone to use this capacity. Both, too, have recently added CD/DVD burning capabilities.
For business use, KDE offers mail, address books scheduling, and task lists as separate small programs. GNOME, on the other hand, has chosen a more centralized approach in Evolution. Evolution could be characterized as a better organized, more easily customized version of Microsoft Outlook, with which it is constantly becoming more compatible. Divided into four views -- mail, contact, memo, tasks -- and easily synced with a phone or PDA, Evolution is designed primarily for business. However, it is memory intensive, although recent versions have been noticeably improved, and still subject to occasional fits of flakiness, all of which might make it seem overkill for a home user.
Office Suites
KDE comes with KOffice, a comprehensive office suite that includes not only a word processor, spreadsheet, presentation program, and database, but also a number of smaller applications, including separate editors for rasterized and scalable vector graphics. KWord, the word processor, is probably the standout application in the office suite, being based on a series of text frames that give it advanced desktop publishing capabilities. However, the other KOffice applications are also suitable for beginning to intermediate use. The main disappointment of KOffice is that most of its applications have evolved more slowly than fans might hope, and many of them are just starting to get the advanced features that would make them a match for OpenOffice.org.
GNOME began its own office suite, but development had not gotten beyond basic functionality for either the AbiWord word processor and the Gnumeric spreadsheet when Sun Microsystems released the code that was to become OpenOffice.org. Plans for GNOME Office were quietly dropped, and, although you still hear it mentioned, it will most likely never be completed.
Today, although AbiWord and Gnumeric are not integrated with each other, both have become mature programs with a solid user base. AbiWord has found its niche as a lightweight word processor, useful on systems with lower memory or as a reader for MS Word attachments downloaded from the web. Similarly, Gnumeric has a reputation among advanced spreadsheet users for the speed of its calculations and unique functions.
Other Applications
Historically, one of KDE's advantages has been the number of programs written specifically for it. In recent releases, GNOME has started to close the gap, especially for programs. Still, it seems accurate to say that, for every three GNOME-based programs, there are at least five KDE-based ones.
Yet, increasingly, many GNOME programs are functionally equivalent to their KDE counterparts. Personal taste and the occasional difference in hardware support aside, there is little to choose between, for example, GNOME's FSpot and KDE's digiKam for uploading and organizing photos or Eye of Gnome and Kview for the quick display of graphics. The same is true for GNOME Baker and K3b for CD and DVD burning, even though K3b has the better reputation, since it was the first easy-to-use burning software for GNU/Linux.
Moreover, in many cases, desktop-independent programs are becoming more common. The GIMP has long been the main tool for rasterized graphics, regardless of the interface used. In the same way, Mozilla Firefox is shoving aside both Konqueror and Epiphany, the Mozilla-based browser that is supposed to the default for GNOME. With other large programs such as Scribus and Inkscape also being designed to be desktop-independent, this trend is likely to continue, especially given the increased cooperation between KDE and GNOME. Existing programs may continue to be oriented towards a particular desktop, but chances are that new programs will not be.
Making a decision
So which desktop should you choose? The answer must be both personal and context-based. Some users make their decision on the basis of aesthetics, arguing that one desktop is more corporate-looking or friendlier than the other. Others choose on the basis of a feature that is important to their work or habits, such as KDE's multiple clipboard or Evolution's business-like structure.
However, if neither GNOME or KDE seems decisively better than the other, why choose at all? With hard disk space no longer at a premium, you can install both desktops with all their bells and whistles in no more than six or seven gigabytes. If you are selective, the desktops and their basic utilities should occupy less than a gigabyte each. After all, not being locked-in to specific programs is part of the power of free software -- so why not take advantage of the fact to pick and choose the best of both?
Labels: Gnome, IBM, KDE, Linux, Storage, Windows
Sunday, December 27, 2009
35 Google open-source projects that you probably don't know
Update:
Currently list is longer than 35 projects, during change from Polish to English I have added one new project - and this is why title says 35 instead 34 ;). After updates there are even more! Sorry for your confusion.
Google is one of the biggest companies supporting OpenSource movement, they released more than 500 open source projects(most of them are samples showing how to use their API). In this article I will try to write about most interesting and free releases from Google, some of them might be abandoned.Update:
List of projects developed at Google and released as opensource (thanks @dobs from reddit) can be displayed also here
Text File processing
- Google CRUSH (Custom Reporting Utilities for SHell)
- CRUSH is a collection of tools for processing delimited-text data from the command line or in shell scripts. Tutorial how to use it is here
C++ libraries and sources
- Google Breakpad
- An open-source multi-platform crash reporting system. Breakpad is a minidump-generation library used for snapshotting processes out in the field for later analysis. The format is similar to core files but was developed by Microsoft for it's crash-uploading facility. A minidump-creation library for Mac/Linux has been implemented so that the crash-processing back-end only needs to understand one format.
- Google GFlags
- The gflags package contains a library that implements commandline flags processing. As such it's a replacement for
getopt(). It has increased flexibility, including built-in support for C++ types likestring. Here is introduction how to use it. - Google Glog
- The glog library implements application-level logging. This library provides logging APIs based on C++-style streams and various helper macros. It can be used under Linux, BSD, and Windows. Here is introduction how to use Glog.
- Google PerfTools
- These tools are for use by developers so that they can create more robust applications. Especially of use to those developing multi-threaded applications in C++ with templates. Includes TCMalloc, heap-checker, heap-profiler and cpu-profiler. Instructions how to use PerfTools can be found here and here.
- Google Sparse Hash
- An extremely memory-efficient hash_map implementation. 2 bits/entry overhead. The SparseHash library contains several hash-map implementations, including implementations that optimize for space or speed. The Google sparsehash package consists of two hashtable implementations: sparse, which is designed to be very space efficient, and dense, which is designed to be very time efficient. For each one, the package provides both a hash-map and a hash-set, to mirror the classes in the common STL implementation. Docs are here.
- Omaha - Google Update
- Omaha, otherwise known as Google Update, is a program to install requested software and keep it up to date. So far, Omaha supports many Google products for Windows, including Google Chrome and Google Earth, but there is no reason for it to only support Google products. Here is Omaha Overview and Developers Setup Guide.
- Protocol Buffers
- Protocol Buffers are a way of encoding structured data in an efficient yet extensible format. Google uses Protocol Buffers for almost all of its internal RPC protocols and file formats. Here is developer guide, this protocol can be used in many languages and it is suported by few IDE - for example NetBeans
- Google Code Prettify
- A Javascript module and CSS file that allows syntax highlighting of source code snippets in an html page. It supports: C/C++, Java, Python, Ruby, PHP, VisualBasic, AWK, Bash, SQL, HTML, XML, CSS, JavaScript, Makefiles and some Perl. Not supported: Smalltalk and all *CAML*. For example click here
- SpriteMe - easy "CSS sprites"
- SpriteMe makes it easy to create CSS sprites (connect many small images to one larger to reduce new connections to webserver when loading webpage). This projects is also available as service under: http://spriteme.org/.
- Redacisaurus
- Reducisaurus is a web service for minifying and serving CSS and JS files. Reducisaurus is based on YUI Compressor and runs on AppEngine.
- JaikuEngine
- JaikuEngine is a social microblogging platform that runs on AppEngine. JaikuEngine powers Jaiku.com. For the mobile client source, see: Jaiku Mobile client. Here is README for project
- Selector Shell
- The Selector Shell is a browser-based tool for testing what CSS becomes in different browsers. It works by taking some raw text, inserting a dynamic STYLE element into the HEAD with that raw text as its content, and then reading the CSSOM to see what the browser has parsed it into. It is written in Javascript. It can be tested here.
- Google Feed Server
- Google Feed Server is an open source Atom Publishing Protocol server based on the Apache Abdera framework. Google Feed Server provides a simple back end for data adapters, which allows developers to quickly deploy a feed for an existing data source such as a database. Google Feed Server also provides the Feed Server Client Tool (FSCT), which lets developers perform create, receive, update, and delete (CRUD) operations on a Feed Server feed. Here are links to start it up and get running.
- Melange, the Spice of Creation
- The goal of this project is to create a framework for representing Open Source contribution workflows, such as the existing Google Summer of Code TM (GSoC) program. Using this framework, it will be possible to host future Google Summer of Code programs (and other similar programs, such as the Google Highly Open Participation TM Contest, or GHOP) on Google App Engine. Here you can checkout Getting Started Guide
- NameBench
- This project hunts down the fastest DNS servers available for your computer to use. namebench runs a fair and thorough benchmark using your web browser history, tcpdump output, or standardized datasets in order to provide an individualized recommendation. namebench is completely free and does not modify your system in any way. This project began as a 20% project at Google. namebench runs on Mac OS X, Windows, and UNIX, and is available with a graphical user interface as well as a command-line interface. BTW: Google has own free public caching DNS servers at ip: 8.8.8.8 i 8.8.4.4.
- Rat Proxy
- A semi-automated, largely passive web application security audit tool, optimized for an accurate and sensitive detection, and automatic annotation, of potential problems and security-relevant design patterns based on the observation of existing, user-initiated traffic in complex web 2.0 environments. It detects and prioritizes broad classes of security problems, such as dynamic cross-site trust model considerations, script inclusion issues, content serving problems, insufficient XSRF and XSS defenses, and much more. Docs are here. Project is written and maintained by Michał Zalewski (lcamtuf).
- TopDraw
- Top Draw is an image generation program. By using simple text scripts, based on the JavaScript programming language, Top Draw can create surprisingly complex and interesting images. The cool part is that the program has built in support for taking your image and installing it as your desktop image. There's even a Viewer application that can be installed in the menubar to automatically run with the parameters (such as the selected script, update interval) that you've specified. The projects is developed in XCode, and runs on:
Mac OS X 10.5 (Leopard) or later. - etherpad
- Open source release of EtherPad, a web-based realtime collaborative document editor. This project exists mainly as an exhibition of the code, to help support those who want to run or modify their own etherpad servers, or for those who are curious about how etherpad's algorithms make realtime collaboration possible. Here are some instructions how to build etherpad, and screencast what is all about. Etherpad uses JavaScript, Java and Comet server for make real time collaboration make working.
- Chromium
- Chromium is the open-source project behind Google Chrome. Chromoium project is about create a powerful platform for developing a new generation of web applications. There are not so many differences between Chrome and Chromium. Here are instructions how to build Chromium on Linux. Tere are also official releases of Chrome for Windows, Mac and Linux.
- V8 Google's open source JavaScript engine
- V8 is Google's open source JavaScript engine. V8 is written in C++ and is used in Google Chrome, the open source browser from Google. V8 implements ECMAScript as specified in ECMA-262, 3rd edition, and runs on Windows XP and Vista, Mac OS X 10.5 (Leopard), and Linux systems that use IA-32 or ARM processors. V8 can run standalone, or can be embedded into any C++ application, here are some helpfull docs how to begin.
- Chromium OS
- Chromium OS is an open-source project that aims to build an operating system that provides a fast, simple, and more secure computing experience for people who spend most of their time on the web. Sources are available on: http://git.chromium.org/ src
- Android
- Android is the first free, open source, and fully customizable mobile platform. Android offers a full stack: an operating system, middleware, and key mobile applications. It also contains a rich set of APIs that allows third-party developers to develop great applications.
The Internet
Tools for MySQL
- Google MySQL Tools
- Various tools for managing, maintaining, and improving the performance of MySQL databases, originally written by Google. This includes:
- mypgrep.py - a tool, similar to pgrep, for managing mysql connections
- compact_innodb.py - compacts innodb datafiles by dumping and reloading all tables
- Google mMAIM
- mMAIM's purpose is to make it easy to monitor and analyze MySQL servers and to easily integrate itself into any environment. It can show Master/Slave sync stats, some efficiency stats, can return statistics from most of the "show" command, and more!
Other projects
- Stressful Application Test (stressapptest)
- Stressful Application Test (or stressapptest, its unix name) tries to maximize randomized traffic to memory from processor and I/O, with the intent of creating a realistic high load situation in order to test the existing hardware devices in a computer. It has been used at Google for some time and now it is available under the apache 2.0 license. Here are some docs: Introduction, Installation Guide and User Guide
- Pop and IMAP Troubleshooter
- The POP and IMAP troubleshooter serves to diagnose and solve connection problems from client machines to email services. It reads the client configuration files (Outlook, Windows Mail, Thunderbird, etc.), checks the individual settings, and then attempts to create POP, IMAP, and SMTP connections using these settings. The troubleshooter is coded in C++ using the Qt environment. It can be used generically, or can be customized for the demands of a particular email service.
- OpenDuckBill
- Openduckbill is a simple command line backup tool for Linux, which is capable of monitoring the files/directories marked for backups for any changes and transferring these changes either to a local backup directory or a remote NFS exported partition or to a remote ssh server using the very common, rsync command. Here is installation guide.
- ZXing
- ZXing (pronounced "zebra crossing") is an open-source, multi-format 1D/2D barcode image processing library implemented in Java. Our focus is on using the built-in camera on mobile phones to photograph and decode barcodes on the device, without communicating with a server. As far I know it can be found on Android Platform. Checkout Getting stared guide, and chackout list of supported devices (My SonyEricson device is capable!).
- Tesseract OCR Engine
- The Tesseract OCR engine was one of the top 3 engines in the 1995 UNLV Accuracy test. Between 1995 and 2006 it had little work done on it, but it is probably one of the most accurate open source OCR engines available. The source code will read a binary, grey or color image and output text. A tiff reader is built in that will read uncompressed TIFF images, or libtiff can be added to read compressed images. Here is: Readme and FAQ
- Neatx - Open Source NX server
- Neatx is an Open Source NX server, similar to the commercial NX server from NoMachine. For more information checkout Project Homeppage. NX protocol is way more roboust than VNC (it can be usefull when having slow Internet connection). Major differences between NX and VNC:
- NX is X11 client it doesn't send bitmaps
- NX works with X, VNC and Remote Desktop (Windows)
- NX buffers data
- NX is easy to install (link in Polish)
- PSVM
- It is the code of the following paper: http://books.nips.cc/papers/files/nips20/NIPS2007_0435.pdf. This is an all-kernel-support version of SVM, which can parallel run on multiple machines. Here is usage.
- The GO programming language
- New programming language developed in Google. It is released using this slogan: "GO a systems programming language expressive, concurrent, garbage-collected"
- The Google Collections Library for Java
- The Google Collections Library is a set of new collection types, implementations and related goodness for Java 5 and higher, brought to you by Google. It is a natural extension of the Java Collections Framework you already know and use.
- Google styleguide
- Every major open-source project has its own style guide: a set of conventions (sometimes arbitrary) about how to write code for that project. It is much easier to understand a large codebase when all the code in it is in a consistent style. "Style" covers a lot of ground, from “use camelCase for variable names” to “never use global variables” to “never use exceptions.” This project holds the style guidelines we use for Google code. If you are modifying a project that originated at Google, you may be pointed to this page to see the style guides that apply to that project. This is worth reading.
Summary
Google is one of the most active companies releasing open source software, on top of that Google 5 times organized Summer Of Code - project where students from all over the world start working for OpenSource and Google pays them scholarship for few months of hard work.Update
- Guice a lightweight dependency injection framework for Java 5 and above
- Thanks JavaBeat for summary.Google Guice is a Dependency Injection Framework that can be used by Applications where Relation-ship/Dependency between Business Objects have to be maintained manually in the Application code. Since Guice support Java 5.0, it takes the benefit of Generics and Annotations thereby making the code type-safe.Documentation is here: Getting stared guide
- Google Sitebrics - web framework powered by Guice
- Sitebricks is a simple development layer for web applications built on top of Google Guice. Sitebricks focuses on early error detection, low-footprint code, and fast development. Like Guice, it also balances idiomatic Java with an emphasis on concise code. Here is Getting Started guide and 5 minute tutorial.
- Google ctemplate
- CTemplate is a simple but powerful template language for C++. It emphasizes separating logic from presentation: it is impossible to embed application logic in this template language. Here is some documentation.
Thanks nostrademons from reddit.com - Google C++ Mocking Framework
- This project was inspired by jMock, EasyMock, and Hamcrest, and designed with C++'s specifics in mind, Google C++ Mocking Framework (or Google Mock for short) is a library for writing and using C++ mock classes. Google Mock:
- lets you create mock classes trivially using simple macros,
- supports a rich set of matchers and actions,
- handles unordered, partially ordered, or completely ordered expectations,
- is extensible by users, and
- works on Linux, Mac OS X, Windows, Windows Mobile, minGW, and Symbian.
Thanks richq from reddit.com - Google C++ Testing Framework
- Google's framework for writing C++ tests on a variety of platforms (Linux, Mac OS X, Windows, Cygwin, Windows CE, and Symbian). Based on the xUnit architecture. Supports automatic test discovery, a rich set of assertions, user-defined assertions, death tests, fatal and non-fatal failures, value- and type-parameterized tests, various options for running the tests, and XML test report generation. Here is Google Test Primer and here is Google Test Dev Guide.
Thanks richq from reddit.com - Google Toolbox for Mac
- Is collection of source code from different Google projects, that may be useful to developers working on Macintosh. This package includes the Google Developer Spotlight Importers. The release notes can be found here.
Thanks buffi from reddit.com - OCRopus
- This is not entirely Google Project but it is donated by Google. OCRopus(tm) is a state-of-the-art document analysis and OCR system, featuring pluggable layout analysis, pluggable character recognition, statistical natural language modelling, and multi-lingual capabilities. The OCRopus engine is based on two research projects: a high-performance handwriting recognizer developed in the mid-90's and deployed by the US Census bureau, and novel high-performance layout analysis methods. OCRopus is development is sponsored by Google and is initially intended for high-throughput, high-volume document conversion efforts. We expect that it will also be an excellent OCR system for many other applications. Here is usage guide and guide how to install development version
Thanks 13xforever from from reddit.com
Labels: Google, Open Source
Monday, December 14, 2009
Top 15 Open Source and/or free apps for scientists and students
1. Type-setting and office
- OpenOffice
Is a complete Office suite package including Writer, Presentation, Spreadsheet, Drawing, and Database applications. It is well suited to academic applications. The features of particular importance are built-in bibliography utility, possibility to export the Text files as LaTeX, BibTeX, MediaWiki, and XHtml, built-in pdf export capability, and good document formatting.
-LaTeX and MikTeX (for Windows)
LaTeX is a powerful mark-up language for writing papers, scientific reports, theses, and so on. It is based on the TeX system originally developed by Donald E. Knuth. LaTeX is super-powerful in writing and managing any sort of academic writing. As a mark-up language, it can be called a programming language for academic writing. Like many programming systems any LaTeX typesetting system should have a compiling component and an editor. Although normal plain text editors can be used for LaTeX typesetting, specialized LaTeX editors are also available. Most Linux distributions come with some sort of TeX system. MikTeX can be used for Windows. There is a huge ecosystem around LaTex and many things related o TeX can be freely downloaded from Comprehensive TeX Archive Network (CTAN).
- Kile
Kile is an Integrated Development Environment (IDE) for development of LaTex documents in Linux. It is based on KDE desktop environment. For screenshots of Kile see here.
-TeXnixCenter
A feature-rich LaTeX editor for Windows freely available under GPL license.
2. Bibliography and reference management
- Bibus
Bibus is a bibliography and citation management software designed to be Open Source, free, and integrative to OpenOffice and MS Word. Bibus is available for Linux and Windows but Mac support is limited at the moment. It can be downloaded from here. Bibus can import and export from EndNote/Reference Manager and also RIS files. For screenshots of Bibus check this link.
- Jabref
It has LaTeX bibliography files (BibTeX files) as its native file format and can be used for management, manipulation, and export of BibTex files. Jabref is maintained for Linux, Windows, and Mac OS X. It can directly search and download from some bibliographic databases. Screenshots can be accessed here.
- Zotero
Zotero is a Firefox browser extension which can be used for storing bibliographic data while browsing. It can be used for managing and citing as well and can save a lot of time particularly the time spent for collection of data. It works with many websites. Read this nice article about how to use Zotero to manage OpenOffice bibliographies.
- There are more Open Source bibliographic management softwares than these three. Read this Wikipedia article about comparison of different proprietary and Open Source reference management softwares.
3. PDF and Postscript related apps
- PDFedit
PDFedit is a great free and Open Source pdf editor for Linux. Read my previous post about editing pdf files with Linux to find more about PDFedit.
- Ghostscript
Ghostscript is an application written mainly in C for viewing ps and pdf files, converting ps files to pdf, and much more. This is available for Linux, Windows, and Mac OS X.
- PDFCreator
It is a free and Open Source pdf creation application based on Ghostscript. This is available only for MS Windows but Vista is not currently well supported. However, the Vista bug is being fixed. PDFCreator was selected by the OpenCD project for creation of pdf files in Windows.
- Wanna more pdf apps (Open Source and proprietary) ? Check this link.
4. Math and computing
- Scilab
Scilab is a free and Open Source technical computing language. It’s syntax and application is very similar to MATLAB and if you already know MATLAB you wouldn’t have much difficulty switching to Scilab. It comes with a number of toolboxes and new applications can be easily added as interfacing with Fortran, Tcl/Tk, C, C++, Java, LabVIEW is possible. Downloadable binaries are available for Linux, Windows, and Mac OS X.
- SciPy
SciPy and NumPy are two scientific computing and numerical analysis packages based on Python. NumPy provides the basic computational capabilities and SciPy is built on top of NumPy to provide a wider range of capabilities. For screenshots of the package see this and this pages.
- SAGE
SAGE is an Open Source mathematics application which is based on Python. Since SAGE is based on Python, the mathematical capabilities of SAGE can be combined by other general capabilities of Python to make more useful things. Interfacing with a number of non-free packages (such as Magma, Maple, Mathematica, MATLAB, and MuPAD) as well as free packages (such as Axiom, GAP, GP/PARI, Macaulay2, Maxima, Octave, and Singular) is possible. Here you can try SAGE online. SAGE can be integrated with some web browsers.
- Octave
GNU Octave is a high-level computational language which is similar to and mostly compatible with MATLAB. It is licensed under GPL license and is available for different platforms.
- Many other technical and scientific computing languages are also available. For other free and non-free alternatives see here, here and here.
5. Graphics and illustration making
- The GIMPThe GNU Image Manipulation Program (GIMP) is an application for photo retouching and manipulating which is similar to non-free software Photoshop. It is available for many platforms including Linux and Windows. In Ubuntu Linux, GIMP is installed by default.
- Inkscape
Inkscape is a free and Open Source vector image editor. It is similar to non-free software Adobe Illustrator which is being widely used also by scholars to make scientific and educational illustrations. It has many advanced capabilities and is getting even better very rapidly.
Labels: Open Source
How to use JabRef (BibTeX) with Microsoft Word 2003
March 25th, 2007 by James
JabRef is one of the best reference managers available and provides a realistic alternative to Endnote, as well as being open-source & free. Unfortunately most users are not aware that JabRef (or any other BibTeX based reference manager) can easily be integrated for use with Microsoft Word. In this guide I will show you step-by-step how to install Mike Brookes‘ excellent free Bibtex4Word (v1.12) Word Macro Package on your Windows XP machine.This post is for an old version of the BibTeX4Word Macro. The newest version can be found here on Mike Brookes’ site, along with excellent documentation.
These instructions assume that you are already familiar with JabRef and have a copy installed on your computer. If you wish you can download JabRef from here. I will cover how to use JabRef in a forthcoming guide.
1. Download MiKTeX
MiKTex is a LaTeX typesetting environment , you don’t need to be too concerned about the details of this, essentially MiKTeX contains BibTeX the ‘engine’ that is used for to generate the different referencing styles that you will now be able to call on to be able to submit to various journals eg. Harvard, Vancouver, Nature etc.
The link to MikTeX is here (and will open in a new window) You need to download and install the basic version, don’t worry about installing all the packages, you don’t need them.
2. Relocate your JabRef data File
Unfortunately BibTeX does not support filenames with spaces in them, if you have spaces in your path to your JabRef file you must relocate your data file to a directory without. My Bibliography file is called “bib.bib” and was located in “My Documents” which contains a space so I relocated it to a new folder “c:\References\bib.bib” Make a note of your location.
3.Set your Path
The macro requires that it can access the BibTeX package from the default path. The simplest way to set this is to go to
Start>>Settings>>Control Panel>> System>>Advanced>>Enviromental Variables>>System Variables
here you need to edit the “Path” entry by adding the path of the BibTeX executable, failure to do so will cause an “Error 53″ The path to my BibTeX executable is
C:\Program Files\MiKTeX 2.5\miktex\bin
Yours should be similar if you followed the default installation. If you are having problems use the Windows search feature to look for “Bibtex.exe”. Remember each entry on the path should be seperated by semi-colons for example my path is:-
d:\WINDOWS\system32;D:\WINDOWS;D:\Program Files\MiKTeX 2.5\miktex\bin;
4. Make Word Startup Folder Visible
By defaut on your machine you may have to make your Word startup folder visible, you can do this by going to Windows Explorer and selecting:-
Tools>>Folder Options>>Hidden files and folders>>Show hidden files and folders & Display the contents of system folders.
If you prefer not to see your system and hidden folders you can reverse this once complete.
5.Download the Macro
This can be found on Mike Brookes’ site here. Right click this link and use the “Save target as” or “Save Link as” option. You need to save it in your MS Word Startup folder which can be found at:-
C:\Documents and Settings\James\Application Data\Microsoft\Word\STARTUP
of course you will have substitute your username for mine, and possibly change the drive letter according to the setup of your machine. If you want this macro to be available to more than one user you will have to do this for each user. There is no need to change the MS Word security settings to enable this macro to work correctly.
6. Load Microsoft Word![]()
Hopefully you will see this new toolbar. First you need to let the BibTeX4Word macro know where you keep your bibliography data file. You do this by clicking on the last but one icon (the open folder) and then finding the bibliography file which you made a note of earlier.
7.Start Citing
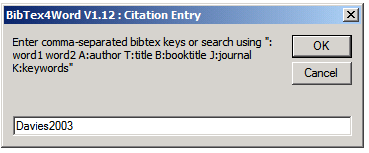 To add a citation position the cursor at the point you wish to insert the citation and click the [+] button, you can either type the BibTeX key directly eg “Davies2003″ or search for author’s papers from your bibliography by the surname by prefixing with A: eg “A:Davies”. You can cite more than one paper by just separating the keys by commas.
8.Creating your Bibliography List
When you are ready to create your bibliography, simply place your cursor where you wish it to appear and click the second icon from the left on the BibTex4Word toolbar. This will produce the bibliography and automatically change the bibliography keys to reference numbers. You can flip between the two with the [eye] key on the toolbar.
9.Changing the Citation Styles
This can be done by clicking the paintbrush logo. To find out what styles are available from your MikTeX installation you can search the BibTeX folder for style files which have the *.bst extension, or create your own as described in Mark’s recent article
Example Citation Styles

A selection of the more popular styles (Plain, Vancouver, AuthorDate and it’s variations) can be found in this pdf or this MS Word file.
Adding more Styles to BibTeX
If you installed the Basic MiKTeX package you will only have a small selection of styles. Not all BibTeX styles work well with the BibTeX4Word Macro, but most do. To add more go to
Start>>Programs>>MiKTeX 2.5>>MiKTeX Package Manger
Here you need to select all of the Category entitled “\BibTeX\BibTeX packages” then right click and select Install, and the latest versions will be downloaded and installed on your computer.
Customising Your Bibliography
You can format your bibliography directly, for example making citation numbers appear as subscript. If you wish you can change the citation brackets from square to round brackets, this is done using MS Word’s search and replace, though this is best left until you have finished your paper or thesis.
Labels: bibliography, BibTex, JabRef
JabRef vs Zotero with Word Processor


I have talked about JabRef and Zotero here several times, especially the latter. However, it’s JabRef which I use for my work. Zotero is quite handy to collection the references but its file format is not a native BibTex file that I can use directly with LaTeX. The BibTeX file exported by Zotero still has some bug (see many discussions on this topic in Zotero’s forum). Therefore, I have disabled its ability to download RIS/Refer files, and use it mostly for general topics (including physics).
Recently, when I wrote the report in MS Word (sometimes I still use that), I thought, why not try Zotero’s Word plugin to insert the citations (or OpenOffice.org Writer, if you prefer)? Well, I only tried for 10+ min and went back to my old way since I had a deadline.
Today, I finally had time to check Zotero’s plugin and JabRef’s customer export filter. The short answer is that JabRef works better for me but Zotero has its own advantages. First, let me show you my old way of putting references in a Word or OOo Writer document, and then outline each method.
The basic in-text citation I used is similar to the basic one for Chicago Manual of Style (CMS) or APA (American Psychological Association) style, but is adopted from the bibtex key: 1st Author’s last name + year of publication, e.g. Einstein1905. In this way, it’s just like writing it in LaTeX file without the \cite command. The style for bibliographies in the end usually follows the style for Physical Review journals. Before this report, I manually typed them or copied them into text from the pdf file produced by LaTeX + BibTeX. Even with the copied text, I still needed to apply the style (bold or italic font) manually. That’s tedious if you have many bibliography entries to modify.
Here are improved methods to make inserting citations easier in MS Word or OOo Writer.
Method 1: Zotero’s plugin
- Go to Add-on (in Word) Click at
 (insert citation) to choose which one to insert (single or multiple entries). Click at “Show Editor” can let you edit the in-text citation format before putting it into the document.
 - Click at
 to generate a bibliography of all items you just cited.
Thoughts:
If using JabRef’s database, first select entries you’d cite and save them into another database (.bib). Open it in any editor and remove the header (two lines starting with #) and the comment lines in the bottom. Then import them into Zotero, which will be placed in a new folder automatically.
I got some problem when I tried to edit the bibliography  to remove unwanted information (e.g url) appearing in the bibliography. An error message showed up, saying “Run-time error ‘91′: Object variable or with block variable not set”. Consulted in Zotero forum but still couldn’t know what the problem was (very persistent).
I gave up and then went to try JabRef. Later (after installing the latest version 1.0.2 and its plugin — released today!), mysteriously I no longer encountered these problems. For instance, when I switched to a different style (Natural Journal), the unwanted url information disappeared, which didn’t come back even after I switched back to CMS. ![]()
Anyway, without this run-time error, Zotero does work very efficiently in Word (supposedly OOo Writer too). You may need to manually edit the bibliography information for some entries if the citation is exported from BibTeX format. The good thing is that it can automatically react according to the changes of the style and adding/removing the bibliography entries (need to click  to update the references). However, Zotero still cannot now can compress the in-text citation numbers, e.g. 1–3, which is a piece of cake for like what LaTeX + BibTeX (with the natbib package) do.
For people who mostly use word processor for writing, Zotero is your best tool, especially that it’s now more mature than the previous versions.
(see also Zotero Extension for MS Word and OpenOffice and New Screencast of Zotero plugin for Word)
[03/17/2009] Update: Ever since, Zotero has improved quite a lot. Check out this recent post, “Try out New Features in Zotero 1.5 Beta“.
Method 2: JabRef custom export filter
- Write the BibTeX key as the in-text citation manually or copy it from JabRef (right click at an entry and select “Copy BibTeX key (I wish there’s a hot key for this)
- Export the selected bibliography entries into a RTF file using your custom export filter. Copy the whole bibliography into the right place of your document.
Thoughts:
The first thing is to create the custom export filter following the bibliography style you prefer. I used the example based on Organization Science’s style from here and tweaked the style close to the one for Reviews of Modern Physics. To add a new export filter:
- Unzip all the files in some directory
- In JabRef/Options/Manage custom exports, add a new one by giving the export name, the file position (the main file, xxx.layout), and the file extension (.rtf)
Tweaking the style takes some trials since I don’t know the markup language used here, but it’s not difficult when you have an example to start with. JabRef provides some commands to replace TeX-specified characters, e.g. {\a} or {\”{o}}, with their HTML or XML presentations (still has some bug when exporting to RTF).
Once the custom export filter is set up, using JabRef with any word processor is very convenient, as long as you use author + year for the in-text citation format. It’s good for people who use LaTeX and BibTeX mostly for their works but occasionally need to work on any word processor.
Wait, JabRef can do more. ![]()
Method 3: JabRef default export filter
Another easy way is to export your JabRef database (or selected entries) into MS Word 2007 (XML) format. Then use the built-in citation tool in Word. For OOo Writer users, check out this help docuement. I didn’t go through this method, so I’m not sure if there’s a bug or not.
Anyway, JabRef is a nice tool, not just for the LaTeX + BibTeX users. ![]()
(see also JabRef HTML Export Filter)
Related Articles:
- Useful Tools Not Just for Students
- Citation Style for Research Papers
- Choosing a BibTeX Style – explain the standard styles and styles it recommends.
PS: MS Office Word Team posted this article on their blog, “Bibliography & Citation 1011“. Even though the bibliography tool in Word 2007 has been improved ![]() , it is still not a good tool to manage your bibliographies (“Manage Sources” under Reference ribbon). Choose either JabRef or Zotero instead.
, it is still not a good tool to manage your bibliographies (“Manage Sources” under Reference ribbon). Choose either JabRef or Zotero instead.
Labels: bibliography, BibTex, JabRef, Zotero
Wednesday, October 07, 2009
Send Large Files by Email
Here are 10 top services that let you send large files.
Mega Upload
![]() Mega Upload is a leading provider of online storage. MegaUpload allows to send files up to 500MB, offers ad-financed free and affordable premium online storage, sophisticated uploading and downloading tools, and high-volume business accounts including pay-per-download.
Mega Upload is a leading provider of online storage. MegaUpload allows to send files up to 500MB, offers ad-financed free and affordable premium online storage, sophisticated uploading and downloading tools, and high-volume business accounts including pay-per-download.
Send Space
![]() Send Space is the best way to send large files too big for email attachments to friends, family and businesses, anywhere in the world. Send Space allows to send files up to 300MB.
Send Space is the best way to send large files too big for email attachments to friends, family and businesses, anywhere in the world. Send Space allows to send files up to 300MB.
You Send It
 You Send It allows you to send files up to 100MB without creating an account. Upon uploading a file to You Send It, an email is sent to the recipient, where they are given a link to download the file. The download is available for 7 days and includes advertising on the page.
Mail Big File
![]() MailBigFile allows you without registration send files up to 100MB. MailBigFile also claims unlimited bandwidth, but since they cap it at 25 downloads per month, there are indeed limits.
MailBigFile allows you without registration send files up to 100MB. MailBigFile also claims unlimited bandwidth, but since they cap it at 25 downloads per month, there are indeed limits.
Drop Send
 DropSend free account provides you with 250MB of storage and up to 5 sends per month. Unlike some of the other services, you have to create an account in order to send a file. The company also offers a desktop client for both Windows and Mac.
 Media Max is focused on storage, but also offers the option to share your files with others. With a free account, you can store files up to 25GB, but thereРІР‚в„ўs a catch: you can only send files up to 10MB with a total transfer limit of 1GB/mo.
Leap File
![]() LeapFILE targets business and enterprise users focused on customized branding and security. The companyРІР‚в„ўs main products allows organizations to setup their own private labeled file exchange services.
LeapFILE targets business and enterprise users focused on customized branding and security. The companyРІР‚в„ўs main products allows organizations to setup their own private labeled file exchange services.
zUpload
zUpload offers up to 500MB to share a single file. A unique URL is generated for each file and is available for 30 days.
MyOtherDrive
MyOtherDrive provides Internet users the ability to store online and share videos, music, photos - any file. The site provides each user with 5GB of storage space that can be selectively shared. Unlike other online storage sites, MyOtherDrive allows you to upload files in bulk (not one by one like so many sites do). The uploaded files can be any size (up to 2GB). The site allows users to create groups and share their folders selectively to these groups (friends, family, coworkers, etc.) . You can define as many groups as necessary and your friends can be placed in more than one group.
DivShare
DivShare - Free Upload unlimited files, offers unlimited downloads, Files stay online forever.
MediaFire
MediaFire - Free unlimited uploads, unlimited downloads, unlimited bandwidth, multiple simultaneous downloads and no sign up required.You can also easily access your files from anywhere with a free account and your own "My Files" page.
Labels: email
Thursday, September 17, 2009
Amazon Kindle outside of the US
Update: 20 March 2009 by nerdgirl– Please make sure to read through the comments for other tips and tricks from lots of people who have used this method and gotten it to work. And this does work with the Kindle 2!
Here is a guide to getting an Amazon Kindle working outside of the US and downloading books outside the US. This is targeted at people who have a Kindle, but don’t have a US credit card / billing address to purchase books.
(Amended some of the instructions based on comments)
- Go to Amazon.com & sign in with your regular username / password (you should be able to log into Amazon.com even with your international account) create a new Amazon.com account (NOTE – .com for U.S. Amazon shop). Do not use your international Amazon account because things go weird. Use a generic email address like gmail.com (with your location set to U.S.) instead of something that is country specific (ie, .co.uk, .fr) otherwise Amazon will block Kindle purchases.
- Use a U.S. address – it doesn’t really matter what address because nothing is going to be shipped there, so look up Pizza Hut in Fresno, CA if you want. Just make sure that the zip code is valid.
- Next step is to buy a Gift Certificate and email the code to yourself.
- Apply the Gift Certificate to your newly created account.
- Register your Kindle online – this is because you won’t be able to use the wireless Whispernet to register the account
- Set up 1-Click payment method associated with your Kindle to make the Kindle books button enabled for purchase. Enter a valid credit card number, but use the U.S. billing address that you set up earlier. This seems to work because once you add the gift certificate Amazon doesn’t attempt to authorise your credit card until you run out of gift certificate credit.
- FINALLY, you should now be able to buy books on the Kindle. Remember to keep your gift certificate topped up with enough credit for what you are purchasing. You will select which Kindle to send the book to wirelessly from the 1-click setting (even though your book won’t be delivered via this method).

- To download your purchased books and sync to your Kindle via USB, go to your digital downloads on Amazon – Be sure to click on the Downloads tab, then you should be able to see your previously purchased book. Click the Download to computer button (note that if you have several Kindles on one account, you need to select which Kindle you want to download for, otherwise the DRM won’t recognise it).

- Connect your Kindle via USB and drop the file into your Documents directory and VOILA!
* Remember you have to be logged in to use any of the account links (duh)
Hope that this works for you. If you have any variations or other tricks to get this going, let me know…
Labels: amazon kindle
![]()